If you’ve ever ordered custom paper cards for weddings, business events, personal milestones, or even promotional campaigns, you know that the fold is what turns a flat piece of paper into something that feels intentional, personal, and professional. As someone who’s been supplying paper cards for 12 years, I’ve folded more card blanks than I can count—from tiny greeting cards that slip into a wallet to oversized announcement cards that make a statement. I’ve seen how a bad fold can ruin an otherwise perfect design, and how a thoughtful fold can make a card feel like it was made just for the recipient. Today, I’m breaking down the most common folding methods I use for every kind of paper card, why each works, and when you should pick one over the other. Paper Card
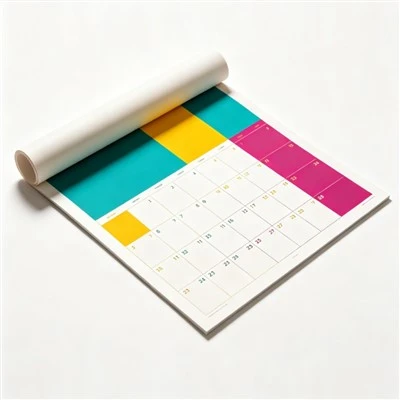
First, let’s get one thing straight: paper card folding isn’t just bending paper in half. It’s about matching the fold to the card’s purpose, weight, and design. A fold meant for a lightweight wedding invitation is way different than one for a thick, heavy business card or a durable greeting card that will be mailed across the country. I always start with the paper weight when deciding on a fold rule of thumb: anything under 100 lb cover weight (which is the standard for most greeting and invitation cards) folds easily with a bone folder, while anything over 120 lb cover might need a scoring tool first—scoring creates a shallow indent where the fold will be, so the paper doesn’t crack or bubble when bent. That small step makes a huge difference in the final look, and I’ve been teaching that to my team since my first year in the business.
The most basic, and most popular, fold for paper cards is the single fold, also called a half fold. You’ve definitely seen this before: it’s the fold that turns an 8.5×11 inch sheet of cardstock into a 5.5×4.25 inch standard greeting card, or a 5×7 inch sheet into a 5×3.5 inch folded card. This is the workhorse fold for almost every type of card, from holiday greetings to birthday cards, basic wedding invitations, and even simple promotional insert cards. Why is it so common? It’s simple, affordable, and fits perfectly into standard envelopes, so there’s no extra cost for custom postage or oversized mailers. For my customers, this is usually their first choice when they’re not sure what fold to pick—it’s reliable, timeless, and works with almost any design. I always recommend a single fold for beginners, too, because it’s the easiest to execute at home if someone is making their own cards, and it’s the most cost-effective for bulk orders. The only thing to watch with a single fold is making sure your design has a half-inch bleed on all edges, especially if you’re printing the front and inside, so there’s no white gap at the fold line when you finish.
Next up is the double parallel fold, also sometimes called a gate fold? Wait no, wait—gate fold is different, let’s get this right. Double parallel fold is when you fold a card three times, all in the same direction, so you end up with three equal panels. For example, a 12×5 inch sheet folded at 4 inches and 8 inches, creating three 4×5 inch panels. This is great for longer-format cards, like announcement cards or extended wedding invitations, because it gives you extra space to add text or images across multiple panels. I use this a lot for corporate promotional cards that need to showcase a product on one panel, company info on another, and a call to action on the third. It’s also popular for mini portfolios, like when a designer wants to send a small sample of their work in a card. The key with a double parallel fold is that the panels should be evenly sized—uneven panels look messy, and they won’t fit into standard envelopes as smoothly. I always make a test fold first with the customer’s paper, especially if they’re using a heavier stock, to make sure the fold doesn’t gap or bend awkwardly when sealed.
Now, the gate fold, which is probably the most eye-catching fold you’ll find for formal cards. This one is when you take a card and fold it so that two panels meet in the middle, like opening a pair of doors. A standard gate fold uses a sheet that’s twice the width of the final card, so a 10×7 inch sheet folded at 5 inches on each side, creating two 5×7 inch panels that open to the middle. What makes this fold special is the big reveal: when you open the card, there’s a full view of the inner design, or a surprise message, or a photo that spans across both inner panels. This is why it’s a top choice for wedding invitations, engagement announcements, and milestone birthday cards—people love the dramatic opening that feels like a gift in itself. I also use gate folds for holiday cards that I supply to small businesses, because they make the card feel more luxurious than a basic single fold without being overly complicated. The only downside is that gate folds need a slightly larger envelope, sometimes a custom size, so I always remind my customers to account for that in their postage budget. Another tip: if you’re adding a seal or a belly band to keep the gate closed, make sure it’s not too tight—you don’t want it to scratch the card’s surface or make the gate hard to open.
Then there’s the tri-panel fold, sometimes called a trifold, which I mentioned earlier but it’s different from the double parallel. Wait, let’s clarify: a tri-panel fold can be two types, but the most common is the accordion tri-fold, where you fold a card back and forth in three panels, so it looks like a small brochure. This is super popular for informational cards, like event programs, business introduction cards, or educational cards for small nonprofits. For example, a local café might use a trifold card to show their menu, opening hours, and contact info, all in a small, easy-to-handle format. The accordion fold is great because it lets you organize content in a logical flow—panel one is the header, panel two is the details, panel three is the call to action or a discount code. I also see this used a lot for trade show cards, where businesses want to pack more info into a small, portable item. The trick with an accordion trifold is that the innermost panel is slightly smaller than the outer two, so it folds smoothly without crumpling. I always add a tiny score line for each fold, even on lighter paper, to prevent the paper from wrinkling when folded twice.
Another fold that’s growing in popularity, especially for boutique and personal cards, is the pocket fold. This is when you create a small pocket along the inside of a card, usually from the right or left panel, to hold an insert, like a photo, a RSVP card, or a small gift card. Pocket folds are usually paired with a gate fold or a single fold, but they’re most common for wedding invitations, where the RSVP card and envelope fit neatly into the pocket, so you don’t need extra enclosures. I love pocket folds because they make the card feel cohesive—everything fits in one place, no loose pieces getting lost in the mail. For my customers, pocket folds add a touch of elegance without being over the top, and they save time on assembly because all the pieces are already integrated into the card. The only thing to note is that the pocket needs to be sized correctly to fit the insert, so I always provide my customers with exact measurements when they order pocket fold cards.
There are also a few more niche folds that I use for specific projects. The tuck fold, for example, is when you fold a tab on one panel of a card and tuck it into a slot on the opposite panel, so the card stays closed without a seal or glue. This is common for small gift cards or thank you notes that need a clean, minimal closure. The book fold, sometimes called a top-fold, is when you fold a card from the top, like a book, so the spine is at the top instead of the side. This is popular for announcement cards, like graduation or baby announcements, because it mimics the look of a small book, making the recipient feel like they’re opening something special. I also use the diagonal fold, which folds a card corner to corner, creating a triangular shape, for small tags or gift cards that are meant to be attached to presents.
Over the years, I’ve learned a lot about what works and what doesn’t when it comes to folding paper cards. The biggest mistake I see customers make is picking a fold that doesn’t match their paper weight. For example, a heavy 140 lb cardstock just won’t fold neatly into a tight gate fold—it will crack along the fold line and look unprofessional. On the other hand, a very lightweight 80 lb cardstock will gap or wrinkle if you use a tight accordion fold. That’s why I always ask my customers for their paper stock and their design needs before suggesting a fold, not just to give them advice but to make sure the final product is exactly what they want.
Another common tip I pass along is always making test folds before bulk ordering. Even if you’ve done a fold a hundred times, every batch of paper is slightly different—some are more textured, some are thicker, some have a coating that makes folding harder. A test fold lets you adjust the score line depth, the fold tightness, and the overall size before you order hundreds or thousands of cards, which saves you time and money in the long run. I always include a free test fold with custom orders, because I want my customers to be happy with their cards when they receive them, not disappointed after they get the bulk shipment.
At the end of the day, the best fold for your paper card depends on three things: what kind of card it is (greeting, invitation, promotional, etc.), what it needs to hold or communicate, and what vibe you want to give off. A simple single fold is perfect for a casual birthday card that needs to slip into a friend’s mailbox, while a dramatic gate fold is the right choice for a wedding invitation that needs to feel special. A trifold works for an informational card that needs to share more than just a few lines of text, and a pocket fold is ideal for keeping all your card’s components organized and secure.
Notebook If you’re looking for custom paper cards for your next event, business campaign, or personal milestone, I can help you pick the right fold, paper stock, and design to make your cards stand out. We’ve worked with hundreds of customers over the years, from small local businesses to large wedding planners, and we handle every order with the same attention to detail, whether it’s a batch of 50 cards or 50,000. Reach out to us to discuss your project, and we’ll walk you through every step to make sure your paper cards turn out exactly how you imagined.
References
- Paper Folding Techniques for Card Designers, Stationery Trends Association, 2022.
- Cardstock Weight and Folding Best Practices, Print and Paper Supply Journal, 2021.
- Custom Fold Envelope Sizing Standards, Postal Service Stationery Guide, 2023.
Jiangyin Kingma Printing Co., Ltd.
As one of the most professional paper card manufacturers and suppliers in China, we also support customized service. Please feel free to wholesale bulk high quality paper card in stock here from our factory. Welcome to contact us for quotation.
Address: 803 Binjiang West Road, Jiangyin City, Jiangsu Province
E-mail: 275695527@qq.com
WebSite: https://www.kingmaprinting.com/
